Quickstart with dbt Mesh
Introduction
dbt Mesh is a framework that helps organizations scale their teams and data assets effectively. It promotes governance best practices and breaks large projects into manageable sections — for faster data development. dbt Mesh is available for dbt Cloud Enterprise accounts.
This guide will teach you how to set up a multi-project design using foundational concepts of dbt Mesh and how to implement a data mesh in dbt Cloud:
- Set up a foundational project called “Jaffle | Data Analytics”
- Set up a downstream project called “Jaffle | Finance”
- Add model access, versions, and contracts
- Set up a dbt Cloud job that is triggered on completion of an upstream job
For more information on why data mesh is important, read this post: What is data mesh? The definition and importance of data mesh.
You can check out dbt Fundamentals for free if you're interested in course learning with videos.
You can also watch the YouTube video on dbt and Snowflake.
Related content:
- Data mesh concepts: What it is and how to get started
- Deciding how to structure your dbt Mesh
- dbt Mesh best practices guide
- dbt Mesh FAQs
Prerequisites
To leverage dbt Mesh, you need the following:
- You must have a dbt Cloud Enterprise account enterprise
- You have access to a cloud data platform, permissions to load the sample data tables, and dbt Cloud permissions to create new projects.
- This guide uses the Jaffle Shop sample data, including
customers,orders, andpaymentstables. Follow the provided instructions to load this data into your respective data platform:
This guide assumes you have experience with or fundamental knowledge of dbt. Take the dbt Fundamentals course first if you are brand new to dbt.
Create and configure two projects
In this section, you'll create two new, empty projects in dbt Cloud to serve as your foundational and downstream projects:
- Foundational projects (or upstream projects) typically contain core models and datasets that serve as the base for further analysis and reporting.
- Downstream projects build on these foundations, often adding more specific transformations or business logic for dedicated teams or purposes.
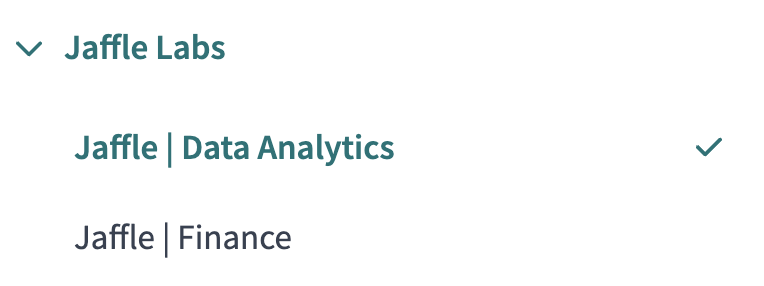
For example, the always-enterprising and fictional account "Jaffle Labs" will create two projects for their data analytics and finance team: Jaffle | Data Analytics and Jaffle | Finance.
To create a new project in dbt Cloud:
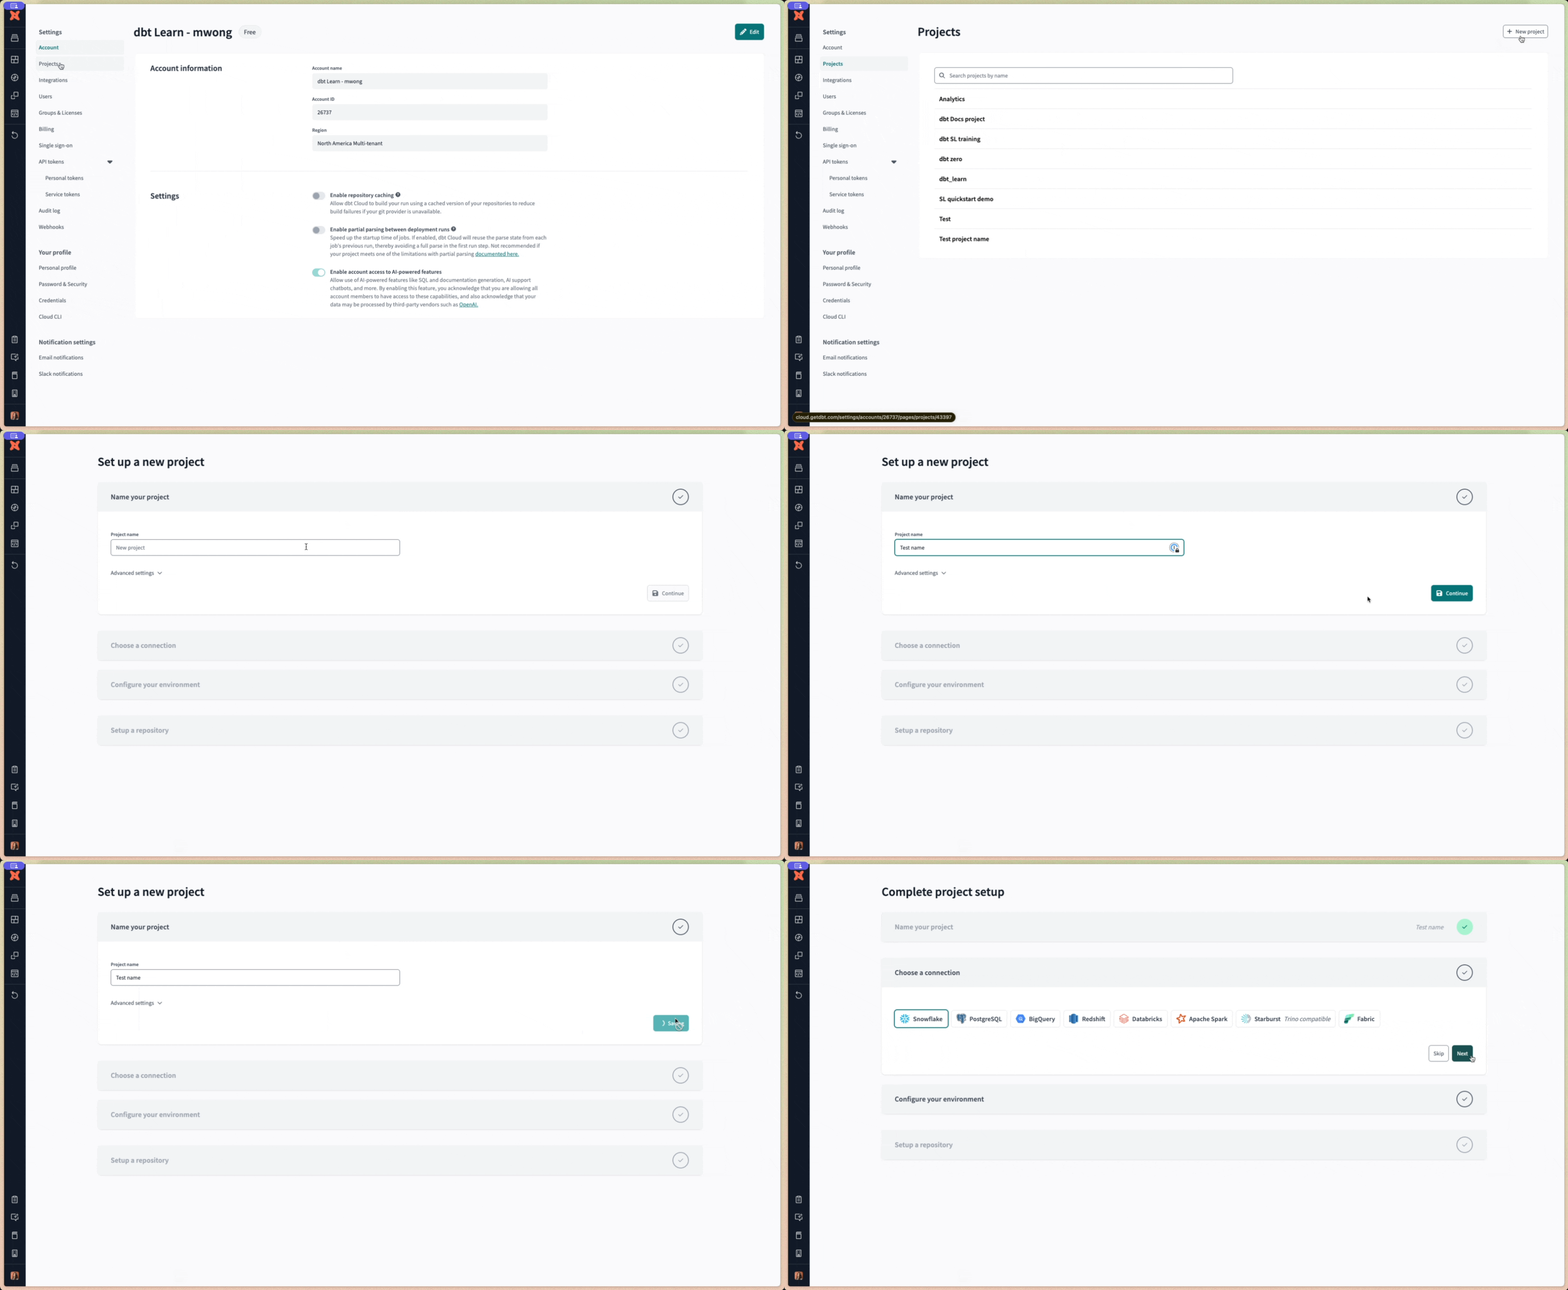
- From Account settings, click + New Project.
- Enter a project name and click Continue.
- Use "Jaffle | Data Analytics" for one project
- Use "Jaffle | Finance" for the other project
- Select your data platform, then Next to set up your connection.
- In the Configure your environment section, enter the Settings for your new project.
- Click Test Connection. This verifies that dbt Cloud can access your data platform account.
- Click Next if the test succeeded. If it fails, you might need to go back and double-check your settings.
- For this guide, make sure you create a single development and Deployment per project.
- For "Jaffle | Data Analytics", set the default database to
jaffle_da. - For "Jaffle | Finance", set the default database to
jaffle_finance
- For "Jaffle | Data Analytics", set the default database to
- For this guide, make sure you create a single development and Deployment per project.
- Continue the prompts to complete the project setup. Once configured, each project should have:
- A data platform connection
- New git repo
- One or more environments (such as development, deployment)
Create a production environment
In dbt Cloud, each project can have one deployment environment designated as "Production.". You must set up a "Production" or "Staging" deployment environment for each project you want to "mesh" together. This enables you to leverage dbt Explorer in the later steps of this guide.
To set a production environment:
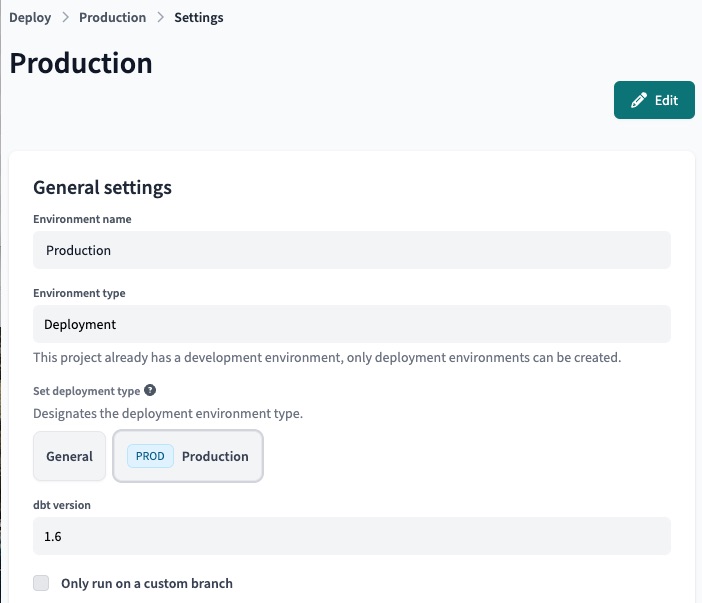
- Navigate to Deploy -> Environments, then click Create New Environment.
- Select Deployment as the environment type.
- Under Set deployment type, select the Production button.
- Select the dbt version.
- Continue filling out the fields as necessary in the Deployment connection and Deployment credentials sections.
- Click Test Connection to confirm the deployment connection.
- Click Save to create a production environment.
Set up a foundational project
This upstream project is where you build your core data assets. This project will contain the raw data sources, staging models, and core business logic.
dbt Cloud enables data practitioners to develop in their tool of choice and comes equipped with a local dbt Cloud CLI or in-browser dbt Cloud IDE.
In this section of the guide, you will set the "Jaffle | Data Analytics" project as your foundational project using the dbt Cloud IDE.
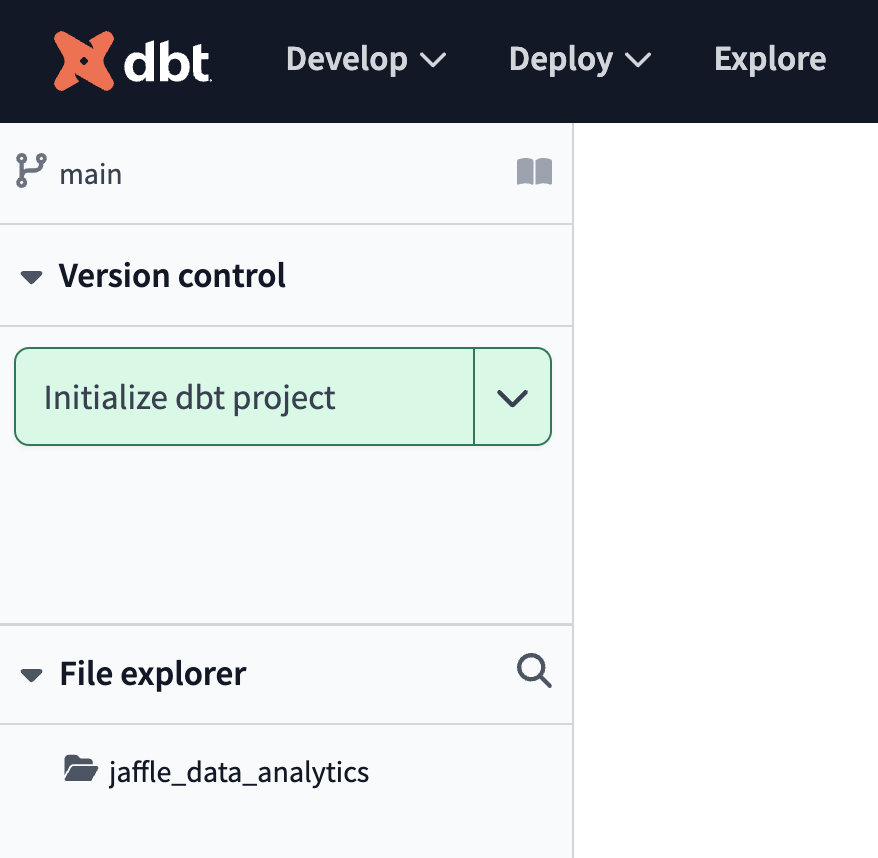
- First, navigate to the Develop page to verify your setup.
- Click Initialize dbt project if you’ve started with an empty repo:
- Delete the
models/examplefolder. - Navigate to the
dbt_project.ymlfile and rename the project (line 5) frommy_new_projecttoanalytics. - In your
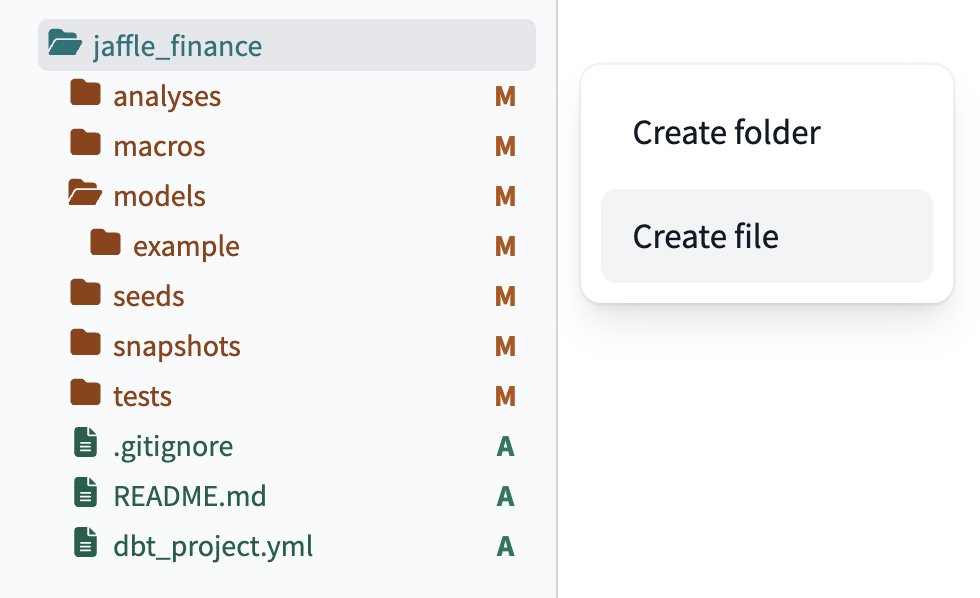
dbt_project.ymlfile, remove lines 39-42 (themy_new_projectmodel reference). - In the File Explorer, hover over the project directory and click the ..., then select Create file.
- Create two new folders:
models/stagingandmodels/core.
Staging layer
Now that you've set up the foundational project, let's start building the data assets. Set up the staging layer as follows:
- Create a new YAML file
models/staging/sources.yml. - Declare the sources by copying the following into the file and clicking Save.
version: 2

sources:
  - name: jaffle_shop
    description: This is a replica of the Postgres database used by our app
    database: raw
    schema: jaffle_shop
    tables:
      - name: customers
        description: One record per customer.
      - name: orders
        description: One record per order. Includes cancelled and deleted orders.
- Create a
models/staging/stg_customers.sqlfile to select from thecustomerstable in thejaffle_shopsource.
select
    id as customer_id,
    first_name,
    last_name

from {{ source('jaffle_shop', 'customers') }}
- Create a
models/staging/stg_orders.sqlfile to select from theorderstable in thejaffle_shopsource.
select
    id as order_id,
    user_id as customer_id,
    order_date,
    status

from {{ source('jaffle_shop', 'orders') }}
- Create a
models/core/fct_orders.sqlfile to build a fact table with customer and order details.
with customers as (
    select *
    from {{ ref('stg_customers') }}
),

orders as (
    select *
    from {{ ref('stg_orders') }}
),

customer_orders as (
    select
        customer_id,
        min(order_date) as first_order_date
    from orders
    group by customer_id
),

final as (
    select
        o.order_id,
        o.order_date,
        o.status,
        c.customer_id,
        c.first_name,
        c.last_name,
        co.first_order_date,
        -- Note that we've used a macro for this so that the appropriate DATEDIFF syntax is used for each respective data platform
        {{ datediff('first_order_date', 'order_date', 'day') }} as days_as_customer_at_purchase
    from orders o
    left join customers c using (customer_id)
    left join customer_orders co using (customer_id)
)

select * from final
- Navigate to the Command bar and execute
dbt build.
Before a downstream team can leverage assets from this foundational project, you need to first:
- Create and define at least one model as “public”
- Run a deployment job successfully
- Note, Enable the Generate docs on run toggle for this job to update the dbt Explorer. Once run, you can click Explore from the upper menu bar and see your lineage, tests, and documentation coming through successfully.
Define a public model and run first job
In the previous section, you've arranged your basic building blocks, now let's integrate dbt Mesh.
Although the Finance team requires the fct_orders model for analyzing payment trends, other models, particularly those in the staging layer used for data cleansing and joining, are not needed by downstream teams.
To make fct_orders publicly available:
- In the
models/core/core.ymlfile, add aaccess: publicclause to the relevant YAML file by adding and saving the following:
version: 2

models:
  - name: fct_orders
    access: public
    description: "Customer and order details"
    columns:
      - name: order_id
        data_type: number
        description: ""

      - name: order_date
        data_type: date
        description: ""

      - name: status
        data_type: varchar
        description: "Indicates the status of the order"

      - name: customer_id
        data_type: number
        description: ""

      - name: first_name
        data_type: varchar
        description: ""

      - name: last_name
        data_type: varchar
        description: ""

      - name: first_order_date
        data_type: date
        description: ""

      - name: days_as_customer_at_purchase
        data_type: number
        description: "Days between this purchase and customer's first purchase"
Note: By default, model access is set to "protected", which means they can only be referenced within the same project. Learn more about access types and model groups here.
- Navigate to the dbt Cloud IDE Lineage tab to see the model noted as Public, below the model name.
- Go to Version control and click the Commit and Sync button to commit your changes.
- Merge your changes to the main or production branch.
Create and run a dbt Cloud job
Before a downstream team can leverage assets from this foundational project, you need to create a production environment and run a deployment job successfully.
To run your first deployment dbt Cloud job, you will need to create a new dbt Cloud job.
- Click Deploy and then Jobs.
- Click Create job and then Deploy job.
- Select the Generate docs on run option. This will reflect the state of this project in the Explore section.
- Then, click Run now to trigger the job.
- After the run is complete, click Explore from the upper menu bar. You should now see your lineage, tests, and documentation coming through successfully.
For details on how dbt Cloud uses metadata from the Staging environment to resolve references in downstream projects, check out the section on Staging with downstream dependencies.
Reference a public model in your downstream project
In this section, you will set up the downstream project, "Jaffle | Finance", and cross-project reference the fct_orders model from the foundational project. Navigate to the Develop page to set up our project:
- If you’ve also started with a new git repo, click Initialize dbt project under the Version control section.
- Delete the
models/examplefolder - Navigate to the dbt_project.yml file and rename the project (line 5) from
my_new_projecttofinance - Navigate to the
dbt_project.ymlfile and remove lines 39-42 (themy_new_projectmodel reference). - In the File Explorer, hover over the project directory, click the ... and Select Create file.
- Name the file
dependencies.yml.
- Add the upstream
analyticsproject and thedbt_utilspackage. Click Save.
packages:
  - package: dbt-labs/dbt_utils
    version: 1.1.1

projects:
  - name: analytics
Staging layer
Now that you've set up the foundational project, let's start building the data assets. Set up the staging layer as follows:
-
Create a new YAML file
models/staging/sources.ymland declare the sources by copying the following into the file and clicking Save.models/staging/sources.ymlversion: 2
sources:
- name: stripe
database: raw
schema: stripe
tables:
- name: payment -
Create
models/staging/stg_payments.sqlto select from thepaymenttable in thestripesource.models/staging/stg_payments.sql
with payments as (
    select * from {{ source('stripe', 'payment') }}
),

final as (
    select
        id as payment_id,
        orderID as order_id,
        paymentMethod as payment_method,
        amount,
        created as payment_date
    from payments
)

select * from final
Reference the public model
You're now set to add a model that explores how payment types vary throughout a customer's journey. This helps determine whether coupon gift cards decrease with repeat purchases, as our marketing team anticipates, or remain consistent.
-
To reference the model, use the following logic to ascertain this:
models/core/agg_customer_payment_journey.sql
with stg_payments as (
    select * from {{ ref('stg_payments') }}
),

fct_orders as (
    select * from {{ ref('analytics', 'fct_orders') }}
),

final as (
    select
        days_as_customer_at_purchase,
        -- we use the pivot macro in the dbt_utils package to create columns that total payments for each method
        {{ dbt_utils.pivot(
            'payment_method',
            dbt_utils.get_column_values(ref('stg_payments'), 'payment_method'),
            agg='sum',
            then_value='amount',
            prefix='total_',
            suffix='_amount'
        ) }},
        sum(amount) as total_amount
    from fct_orders
    left join stg_payments using (order_id)
    group by 1
)

select * from final -
Notice the cross-project ref at work! When you add the
ref, the dbt Cloud IDE's auto-complete feature recognizes the public model as available.
- This automatically resolves (or links) to the correct database, schema, and table/view set by the upstream project.
- You can also see this connection displayed in the live Lineage tab.
Add model versions and contracts
How can you enhance resilience and add guardrails to this type of multi-project relationship? You can adopt best practices from software engineering by:
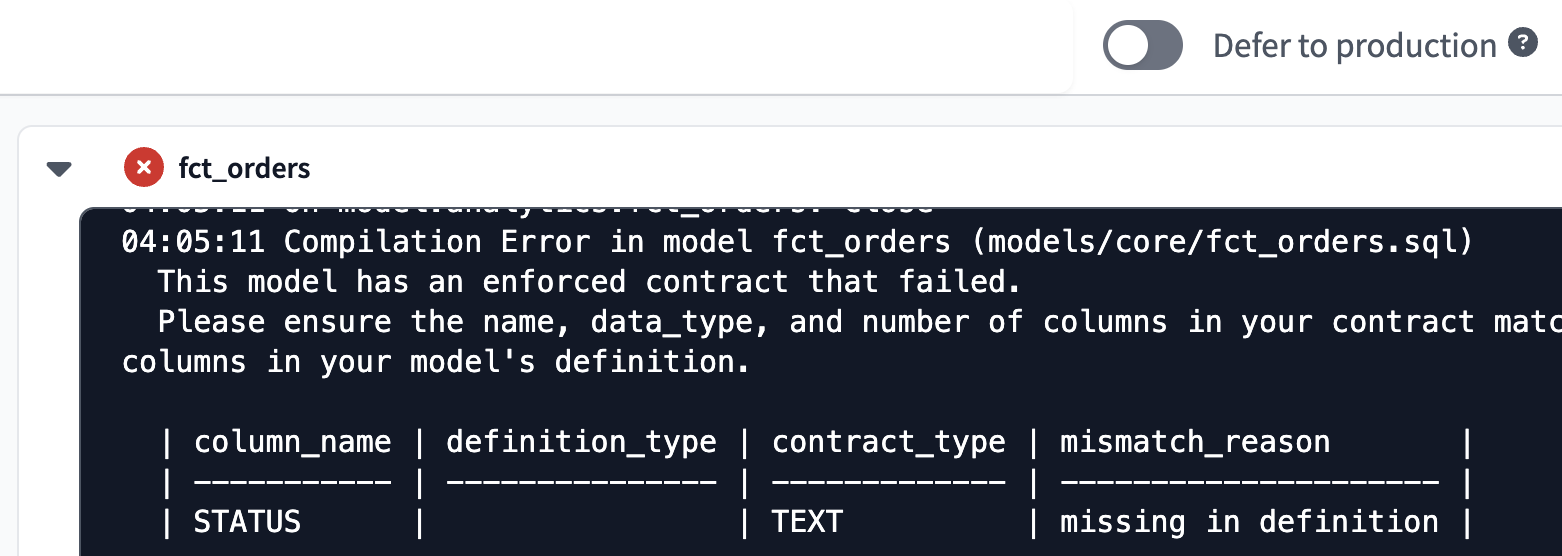
- Defining model contracts — Set up model contracts in dbt to define a set of upfront "guarantees" that define the shape of your model. While building your model, dbt will verify that your model's transformation will produce a dataset matching up with its contract; if not, the build fails.
- Defining model versions — Use model versions to manage updates and handle breaking changes systematically.
Set up model contracts
As part of the Data Analytics team, you may want to ensure the fct_orders model is reliable for downstream users, like the Finance team.
- Navigate to
models/core/core.ymland under thefct_ordersmodel before thecolumns:section, add a data contract to enforce reliability:
models:
  - name: fct_orders
    access: public
    description: “Customer and order details”
    config:
      contract:
        enforced: true
    columns:
      - name: order_id
        .....
- Test what would happen if this contract were violated. In
models/core/fct_orders.sql, comment out theorders.statuscolumn and click Build to try building the model.- If the contract is breached, the build fails, as seen in the command bar history.
Set up model versions
In this section, you will set up model versions by the Data Analytics team as they upgrade the fct_orders model while offering backward compatibility and a migration notice to the downstream Finance team.
-
Rename the existing model file from
models/core/fct_orders.sqltomodels/core/fct_orders_v1.sql. -
Create a new file
models/core/fct_orders_v2.sqland adjust the schema:- Comment out
o.statusin thefinalCTE. - Add a new field,
case when o.status = 'returned' then true else false end as is_returnto indicate if an order was returned.
- Comment out
-
Then, add the following to your
models/core/core.ymlfile:- The
is_returncolumn - The two model
versions - A
latest_versionto indicate which model is the latest (and should be used by default, unless specified otherwise) - A
deprecation_dateto version 1 as well to indicate when the model will be deprecated.
- The
-
It should now read as follows:
version: 2

models:
  - name: fct_orders
    access: public
    description: "Customer and order details"
    latest_version: 2
    config:
      contract:
        enforced: true
    columns:
      - name: order_id
        data_type: number
        description: ""

      - name: order_date
        data_type: date
        description: ""

      - name: status
        data_type: varchar
        description: "Indicates the status of the order"

      - name: is_return
        data_type: boolean
        description: "Indicates if an order was returned"

      - name: customer_id
        data_type: number
        description: ""

      - name: first_name
        data_type: varchar
        description: ""

      - name: last_name
        data_type: varchar
        description: ""

      - name: first_order_date
        data_type: date
        description: ""

      - name: days_as_customer_at_purchase
        data_type: number
        description: "Days between this purchase and customer's first purchase"

    # Declare the versions, and highlight the diffs
    versions:

      - v: 1
        deprecation_date: 2024-06-30 00:00:00.00+00:00
        columns:
          # This means: use the 'columns' list from above, but exclude is_return
          - include: all
            exclude: [is_return]

      - v: 2
        columns:
          # This means: use the 'columns' list from above, but exclude status
          - include: all
            exclude: [status]
- Verify how dbt compiles the
refstatement based on the updates. Open a new file, add the following select statements, and click Compile. Note how each ref is compiled to the specified version (or the latest version if not specified).
select * from {{ ref('fct_orders', v=1) }}
select * from {{ ref('fct_orders', v=2) }}
select * from {{ ref('fct_orders') }}
Add a dbt Cloud job in the downstream project
Before proceeding, make sure you commit and merge your changes in both the “Jaffle | Data Analytics” and “Jaffle | Finance” projects.
A member of the Finance team would like to schedule a dbt Cloud job for their customer payment journey analysis immediately after the data analytics team refreshes their pipelines.
- In the “Jaffle | Finance” project, go to the Jobs page by navigating to Deploy and then Jobs.
- Then click Create job and then Deploy job.
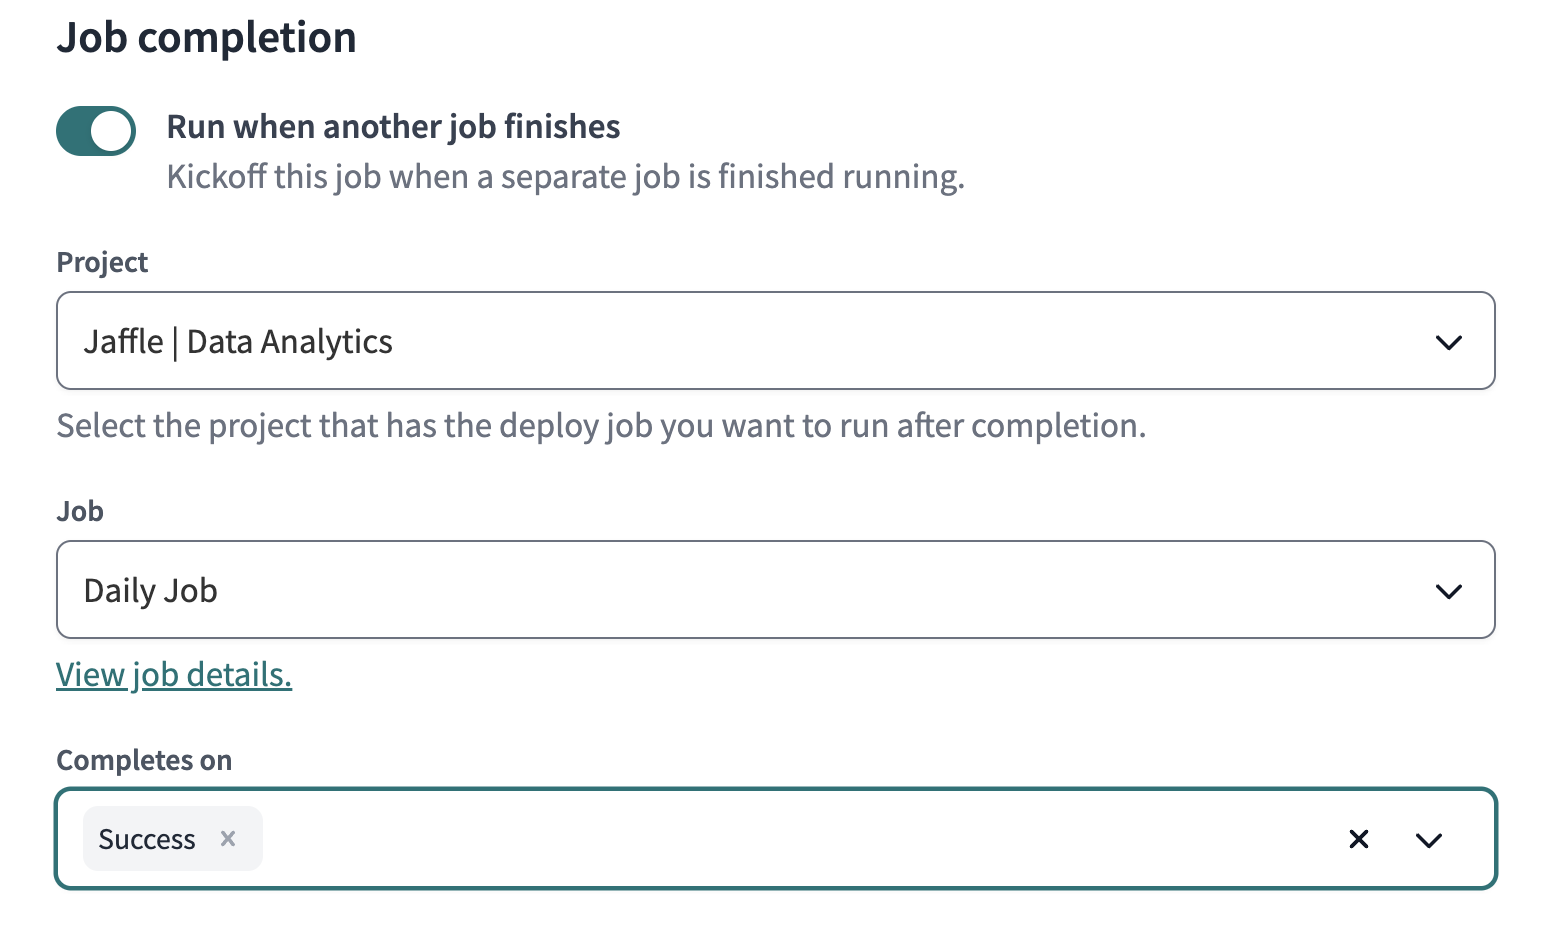
- Add a name for the job, then scroll to the bottom of the Job completion section.
- In Job completion section, configure the job to Run when another job finishes and select the upstream job from the “Jaffle | Data Analytics” project.
- Click Save and verify the job is set up correctly.
- Go to the “Jaffle | Data Analytics” jobs page. Select the Daily job and click Run now.
- Once this job completes successfully, go back to the “Jaffle | Finance” jobs page. You should see that the Finance team’s job was triggered automatically.
This simplifies the process of staying in sync with the upstream tables and removes the need for more sophisticated orchestration skills, such as coordinating jobs across projects via an external orchestrator.
View deprecation warning
To find out how long the Finance team has to migrate from fct_orders_v1 to fct_orders_v2, follow these steps:
- In the “Jaffle | Finance” project, navigate to the Develop page.
- Edit the cross-project ref to use v=1 in
models/marts/agg_customer_payment_journey.sql:
with stg_payments as (
    select * from {{ ref('stg_payments') }}
),

fct_orders as (
    select * from {{ ref('analytics', 'fct_orders', v=1) }}
),

final as (
    select
        days_as_customer_at_purchase,
        -- we use the pivot macro in the dbt_utils package to create columns that total payments for each method
        {{ dbt_utils.pivot(
            'payment_method',
            dbt_utils.get_column_values(ref('stg_payments'), 'payment_method'),
            agg='sum',
            then_value='amount',
            prefix='total_',
            suffix='_amount'
        ) }},
        sum(amount) as total_amount
    from fct_orders
    left join stg_payments using (order_id)
    group by 1
)

select * from final
- In the dbt Cloud IDE, go to Version control to commit and merge the changes.
- Go to the Deploy and then Jobs page.
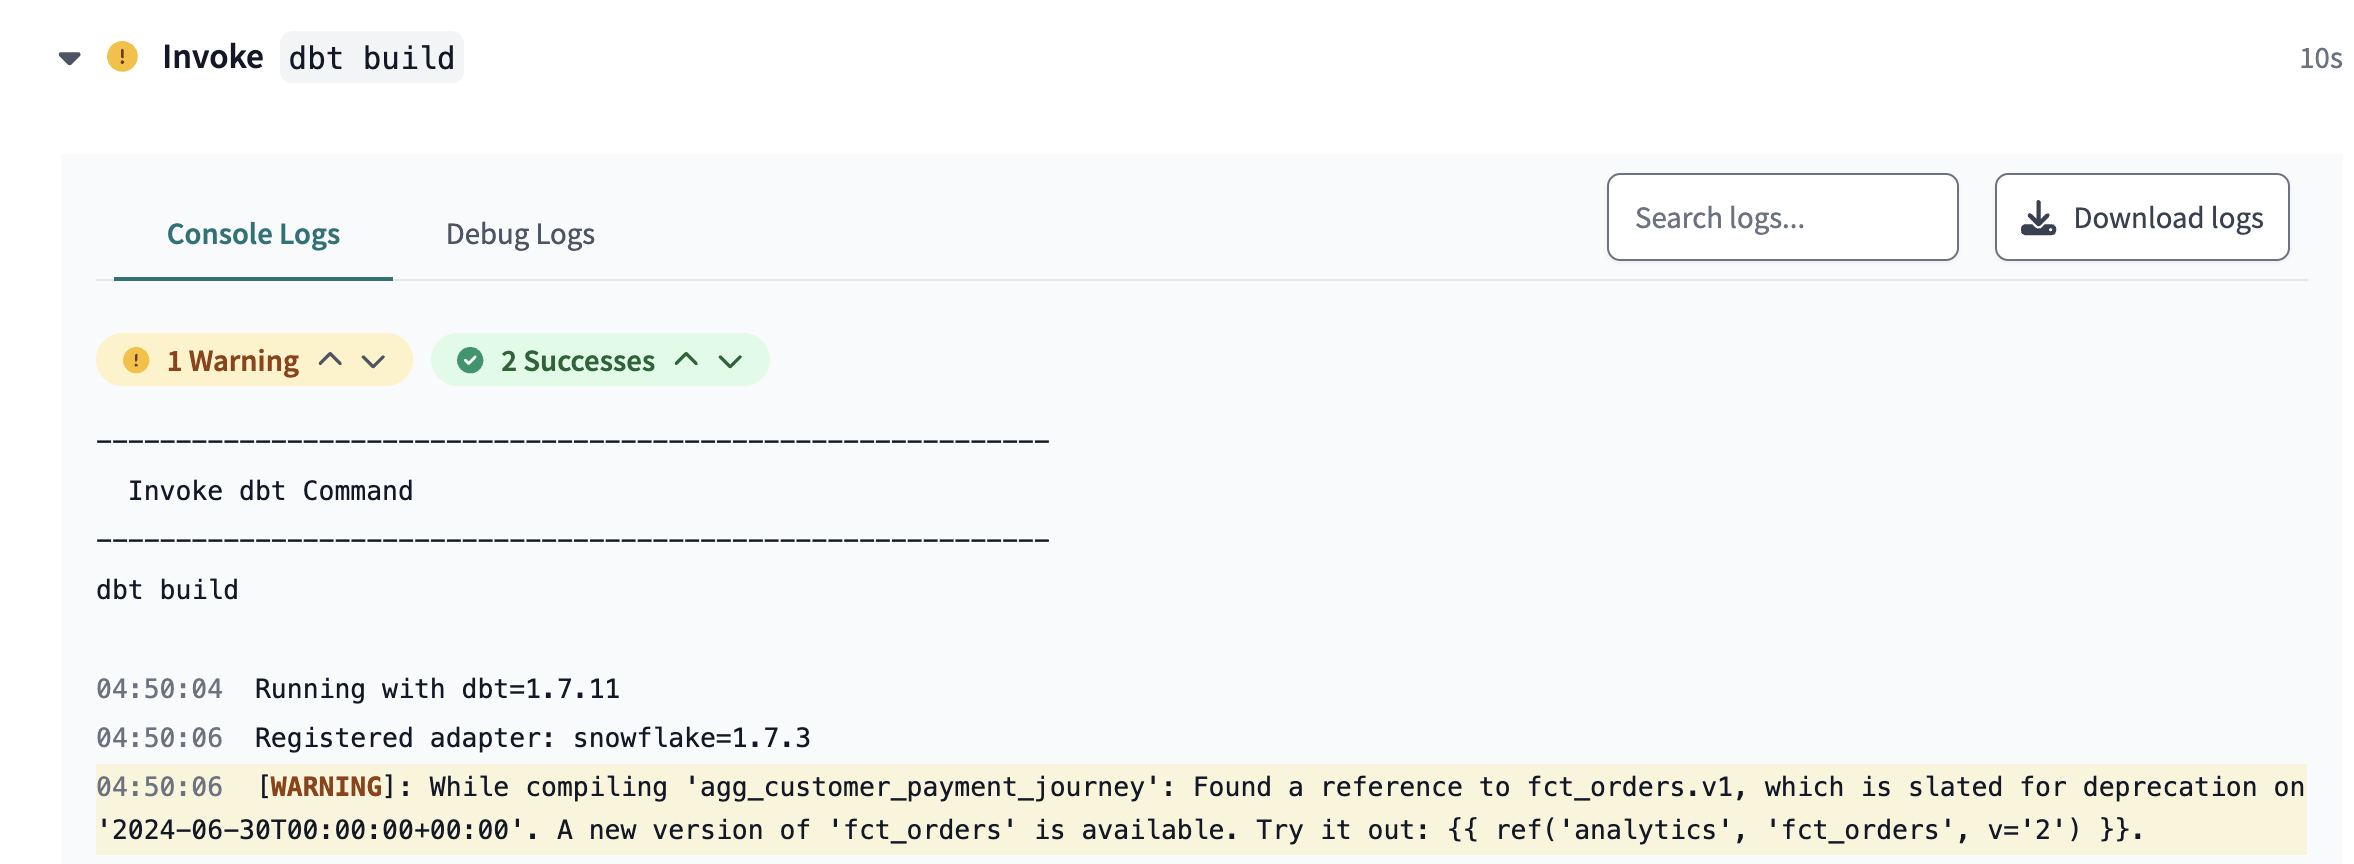
- Click Run now to run the Finance job. The
agg_customer_payment_journeymodel will build and display a deprecation date warning.
View lineage with dbt Explorer
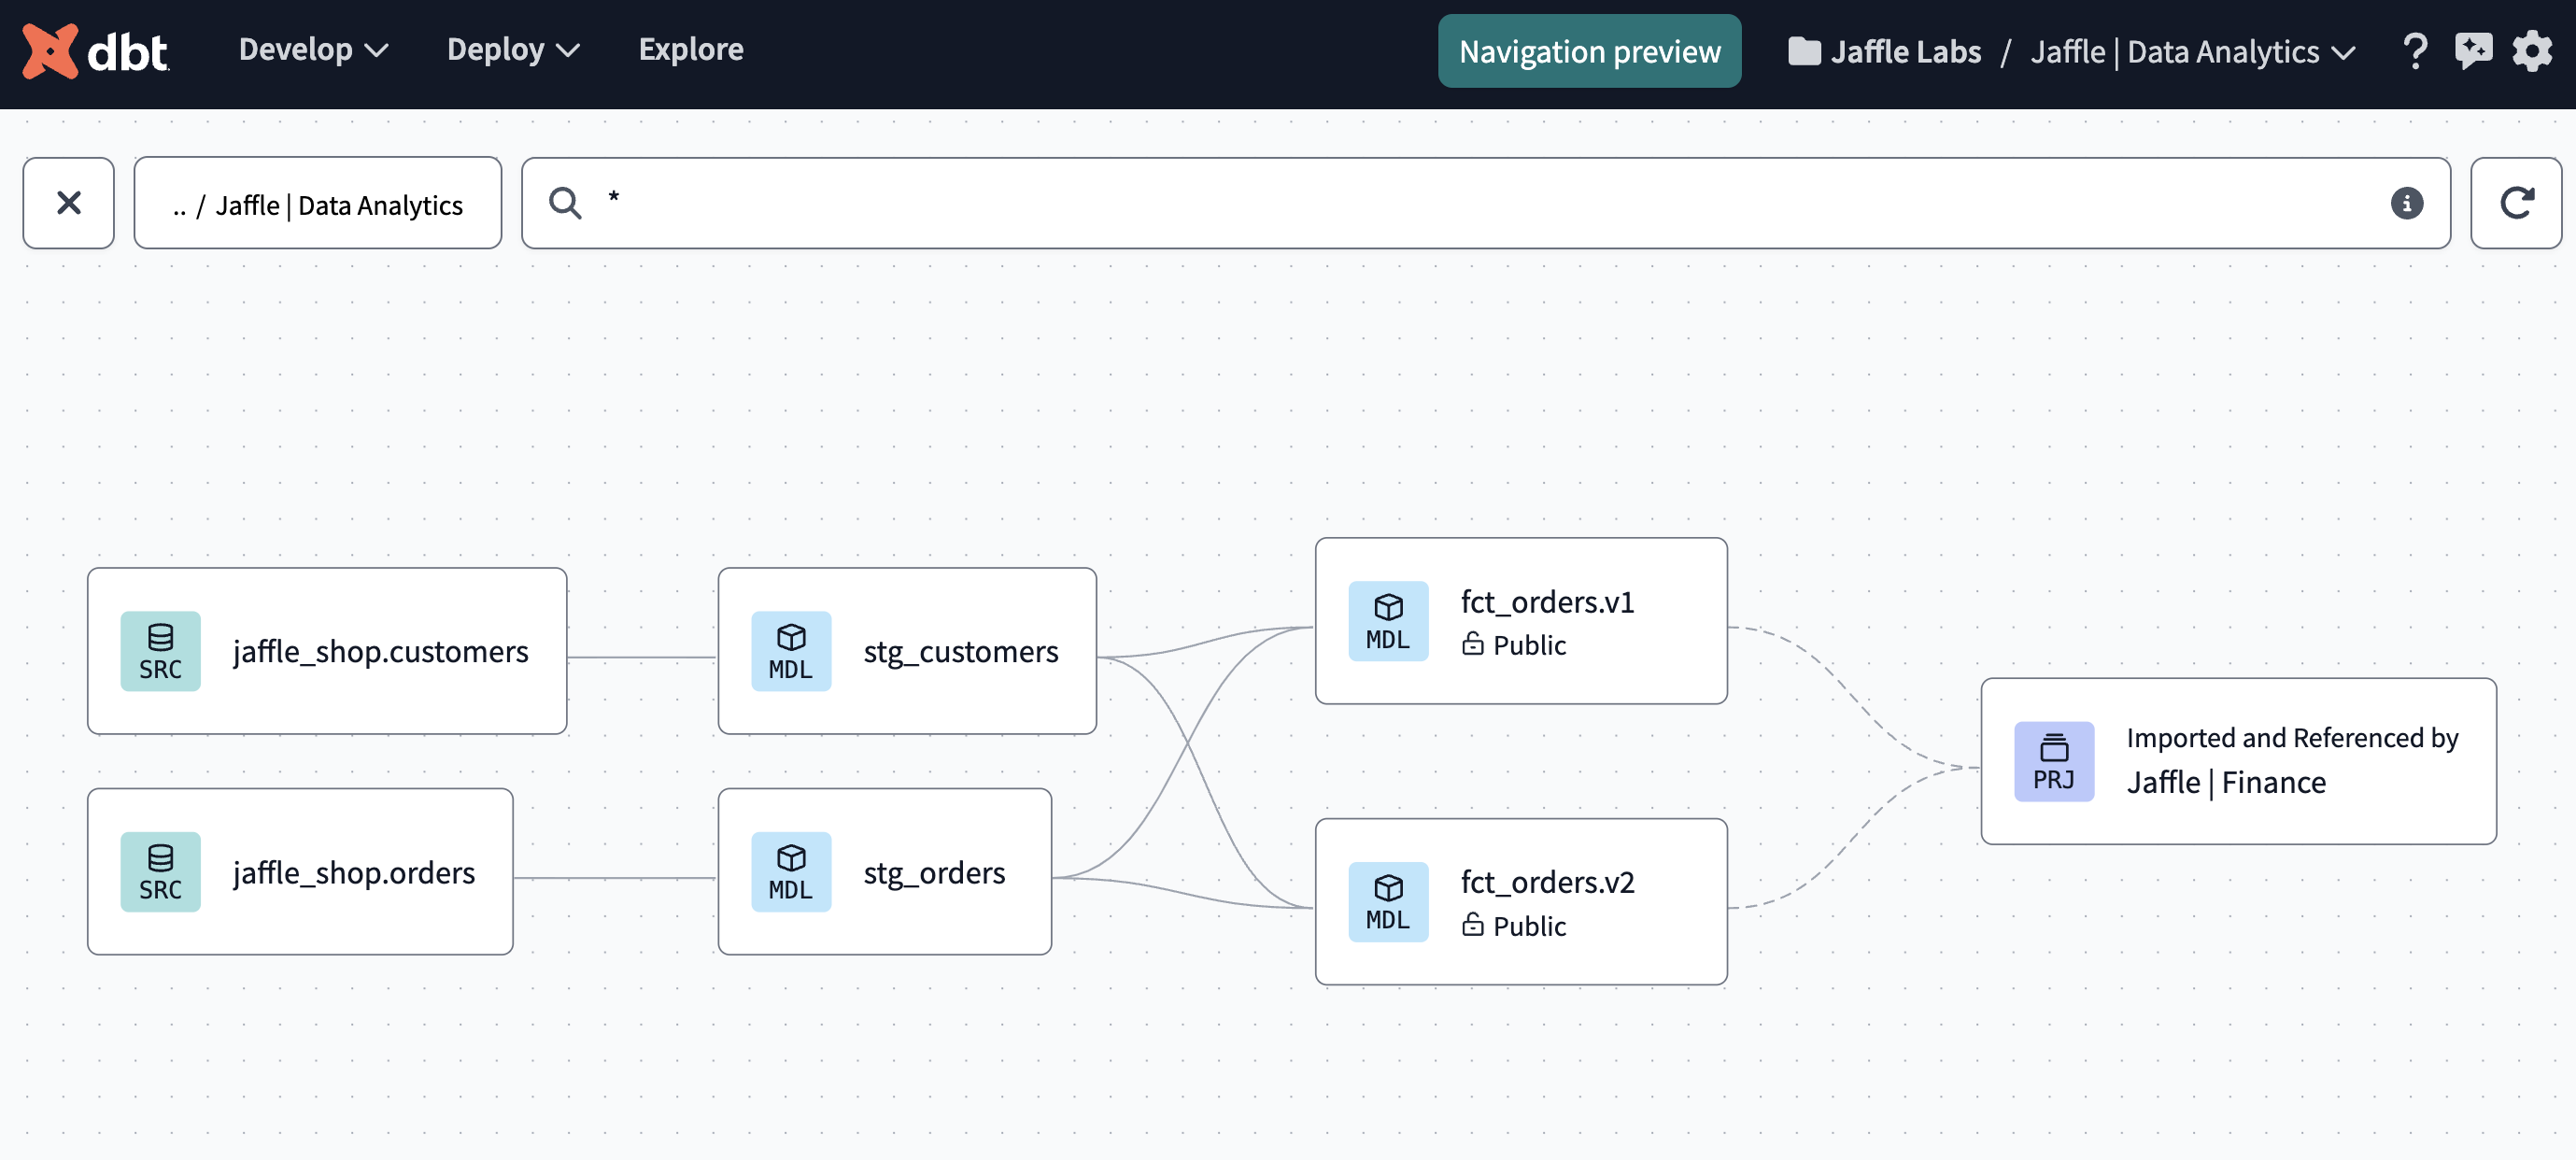
Use dbt Explorer to view the lineage across projects in dbt Cloud. Navigate to the Explore page for each of your projects — you should now view the lineage seamlessly across projects.
What's next
Congratulations 🎉! You're ready to bring the benefits of dbt Mesh to your organization. You've learned:
- How to establish a foundational project "Jaffle | Data Analytics."
- Create a downstream project "Jaffle | Finance."
- Implement model access, versions, and contracts.
- Set up dbt Cloud jobs triggered by upstream job completions.
Here are some additional resources to help you continue your journey:
